Quick Start
This quick start guide shows how to install Kraken CI, configure a simple project and run the first build.
1. Download Kraken Files for Docker Compose
Download configuration files for Docker Compose from Kraken GitHub releases page. They are:
- kraken-docker-compose-X.Y.yaml - a services configuration file for Docker Compose
- kraken-X.Y.env - an example configuration for Kraken services that is used by Docker Compose file
2. Start Kraken Services
In a terminal, in the folder where downloaded files are located, run:
docker-compose --env-file kraken-X.Y.env -f kraken-docker-compose-X.Y.yaml up
Now you should see lots of logs. They will not stop. First, Docker images are downloaded, and then services are started.
Try to get to the web page on http://localhost:8080.
3. Log In
On the main page, log in as admin using admin/admin credentials.

After logging in, the dashboard page will appear. It shows tiles with
projects and their branches. There is already a prepared project
called Demo.
But first, a built-in agent that will be executing jobs needs to be authorized.
4. Authorize Agent
Go to the menu Agents -> Discovered. The Discovered Agents page shows agents that try to connect to the Kraken server but were not yet authorized by an admin.
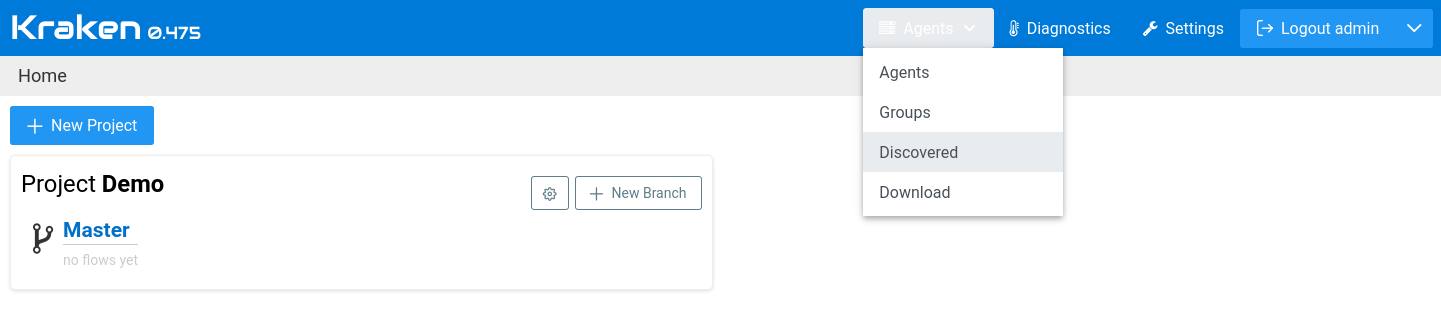
Select the checkbox and click the Authorized button.
Now we can go back to the main page (the dashboard) and explore
Demo project. Click on the Kraken logo in the top left corner.
More details about adding additional agents can be found on agents docs page.
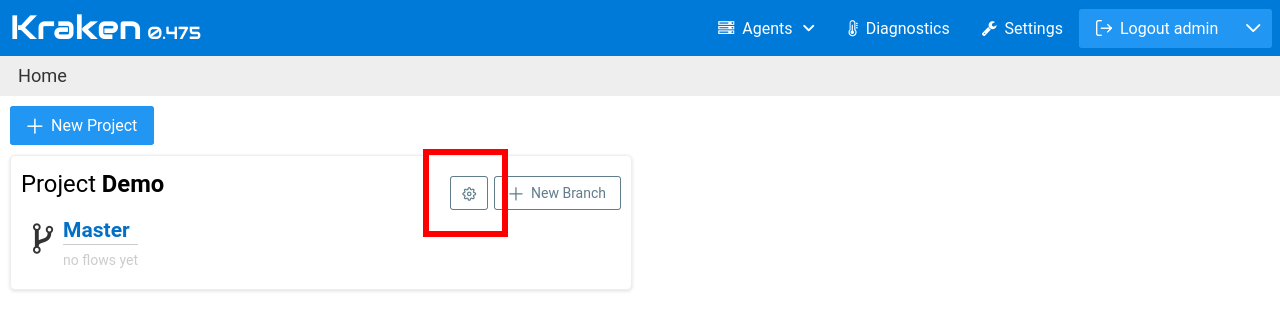
5. The First Project and its Branch
Click the cog icon on the right side of Project Demo. It leads to
the project settings page.
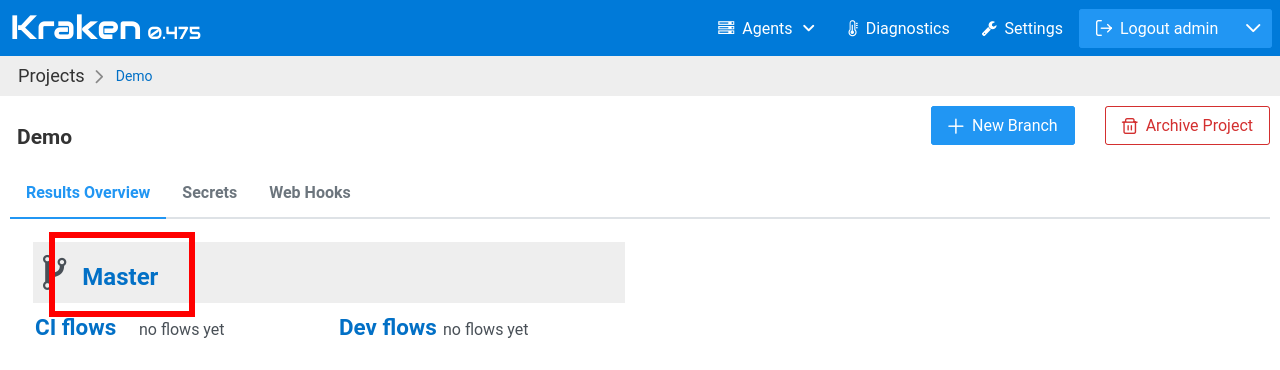
On the project page, there is a list of branches. Let's go to the
already prepared Master branch:
On the branch page, there is a defined workflow that consists of stages.
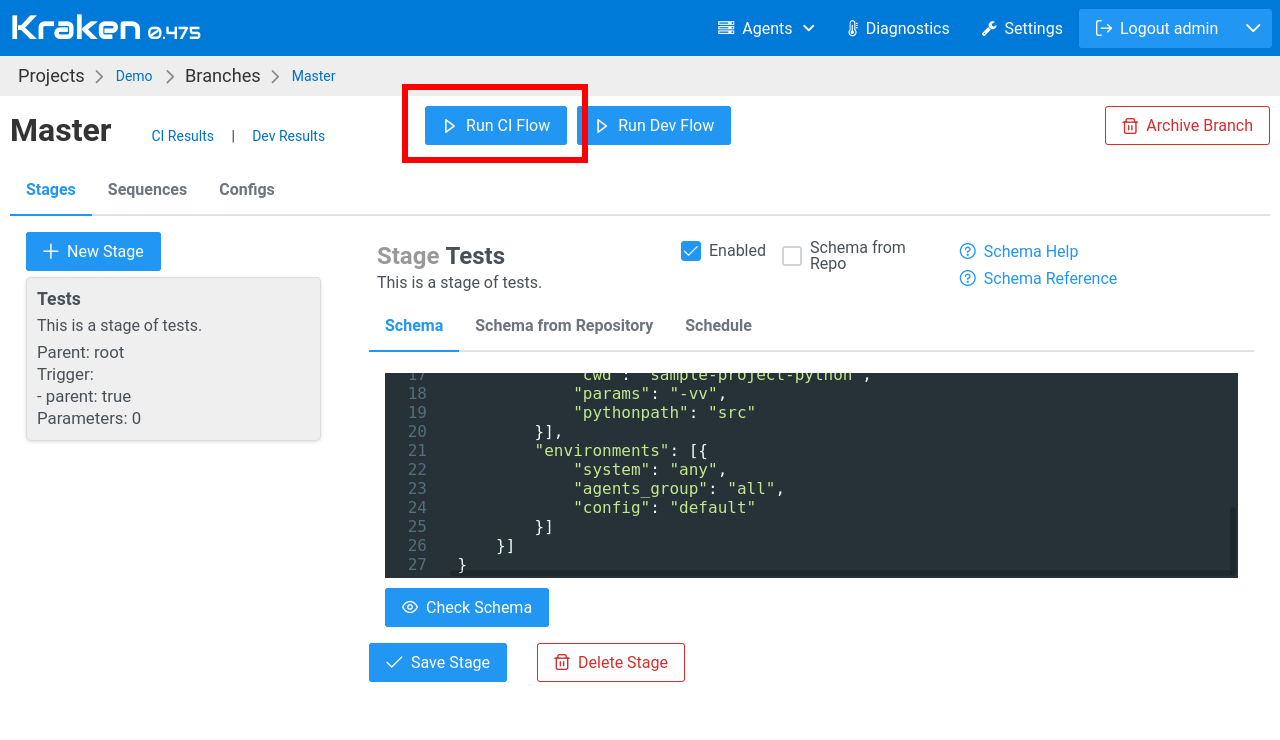
On the screen, on the left, there is visible one stage, Tests. The
right side presents details of this stage. The black box shows the
critical part of the stage: it is a workflow schema that is written in
Starlark/Python.
Currently, the stage's workflow pulls a sample project from
https://github.com/Kraken-CI/sample-project-python.git and then run
pytest tests.
6. Trigger the First Flow
Click the Run CI Flow button to trigger the first flow of the branch
workflow, and then confirm it by clicking the Submit button.
The next page shows triggered flow details.

On the left side, there is a list of runs of stages (currently there is
only one run: Tests), and on the right, there are details of this
stage run. All is green, so it means that all completed successfully.
7. Results of The Run
Click the Tests run link to get to results of the run.
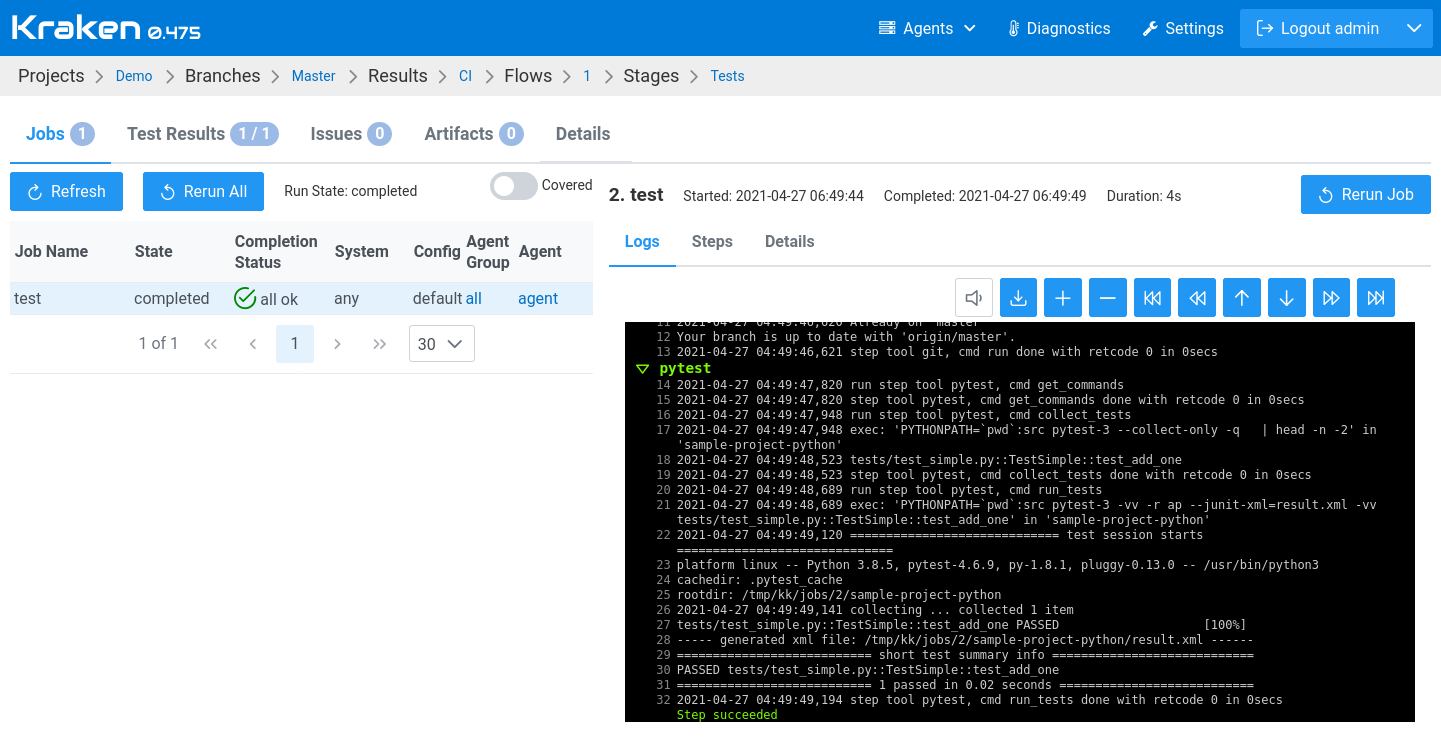
The first tab, Jobs, on the run results page, shows a list of executed jobs. Our job was pretty quick, so we see the final results. If a job takes more time, then here will be presented its live status and logs.
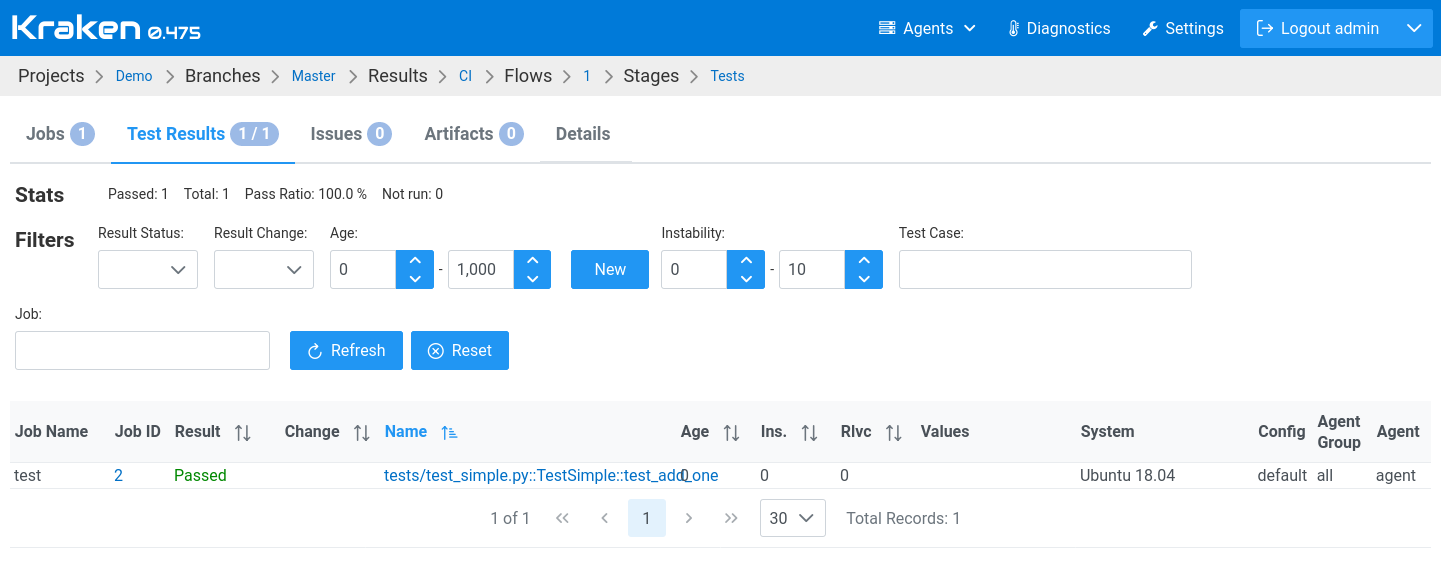
The next tab, Test Results, presents a table with test cases and their status (passed, failed, etc.).
We may conclude the quick start guide here. We encourage you to try to play with the workflow schema and check what can be accomplished more.